Visual Assignment 2! This one was great. Just the assignment itself was hilarious because i love both historical figures and disasters. What mostly attracted me this assignment was the whole idea of cropping. I get the hang of cropping when i completed the “Me and Bae” assignment where i cropped out Stringer and Avon into the bodies of Will and Jada Smith. Of course if i didn’t do that assignment, this one would have taken me twice as long. Surprisingly, there were no hiccups when i created this so i pushed my luck and made two separate photos. Good thing i’m a master with GIMP because i’m seriously proud of both of these. I might secretly make the FDR one my screen saver.
Crop 1: FDR & Pompeii
As you can tell, this is a picture of our famous 32nd President Of The United States of America. FDR is hands down my favorite president so i had to choose him. The only problem was, what do i pick as a background? I thought it would be funny to pick something way out him time zone so i chose the eruption of Mt. Vesuvius. I know i shouldn’t be as proud of this because a lot of innocent people died, but ah, come on… Especially the way i rotated FDR, it almost looks like he’s coming out of the volcano.
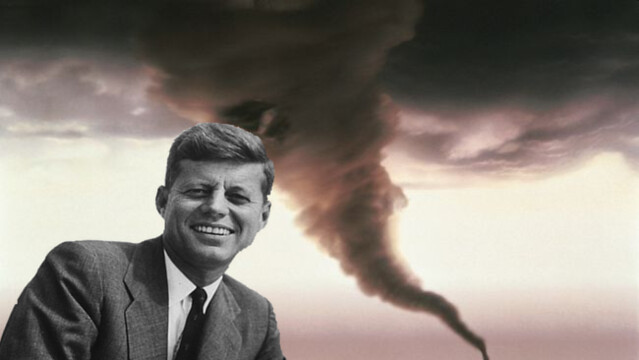
2. JFK & Twister
Like the title says, i chose JFK as my next victim. He is my second favorite president, right behind FDR. The background i chose for this was just a simple tornado. I wanted to pick natural disasters rather than acts of violence so i strayed away from wars and such. I think this picture looks really good, so feel free to save it to your computer. ![]()
GIMP:
I’ve used GIMP before in a prior assignment which uses the exact same steps of cropping, so here they are!
Cut Head:
What I did here was open GIMP and chose the scissor icon thinking it would cut, and yes, it did! I cut around Avon and Stringer’s heads. After not knowing what to do next, I watched this tutorial which helped me a lot.
Layers: As the tutorial says, you go under the “Layer” menu and choose transparency then choose “Add Alpha” which I did.
Select: Now you go under the “Select” menu and choose “Invert”. After invert you now have the background selected. Now go under “Edit” and press clear.
DON’T FORGET PNG LIKE ME!: Now, Please… Please… don’t forget to save the image as a PNG so the background is not white. I was stuck on this for almost 2 hours wondering why my background wasn’t transparent. Then after emailing/tweeting/bothering Groom, he gave me his words of wisdom. Keep in mind, this whole process is just for cutting the heads out…. There’s more.
Open As Layers: Yes, open the pictures as layers. From here, you select the tool that is for moving layers and you shift the floating heads over the bodies of the soon to be headless. That’s really all it takes. I wish i could say that with more sincerity but this process was frustrating for me. Hopefully you will avoid frustration.
ENJOY!


