For this tutorial I will take you step by step through the process of completing Barcode Transformation. This process is the way that I figured out how to do it but there may be other ways to do it.
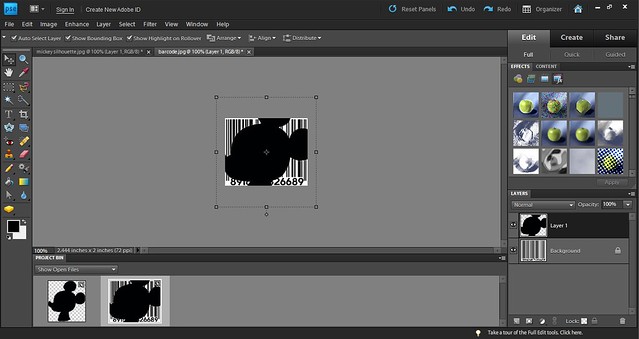
1. Choose the design and barcode you want to use. I used google to get a silhouette image of Mickey Mouse and then just googled random barcodes and chose one.


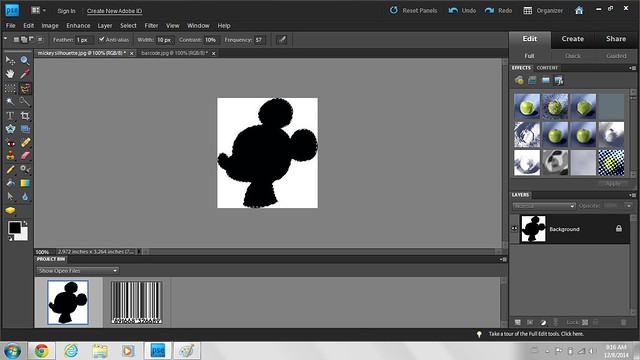
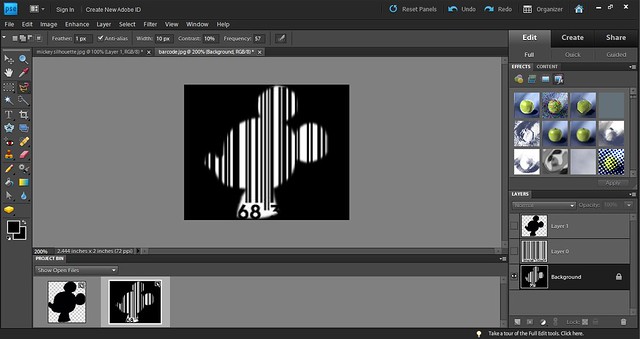
2. Open the Silhouette image and the barcode in Adobe Photoshop. Each one should open as its own file. As you see below each one is its own project right now.
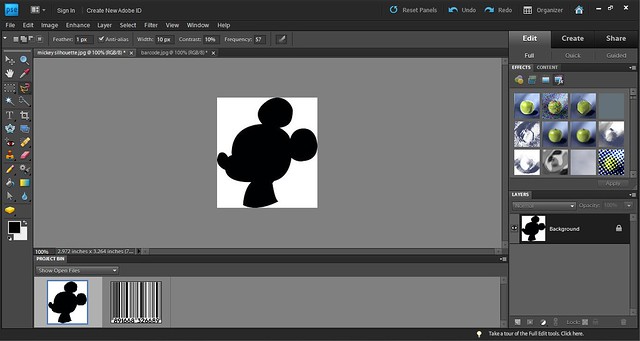
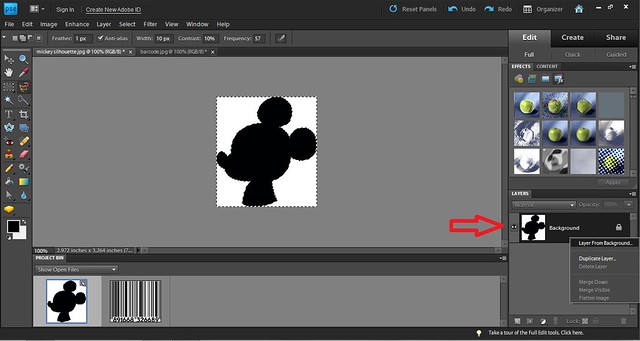
3. You need to change the image from “Background” to “Layer.” To do this on the right where you see the image and it says background, right click on that area and choose “Layer from background.” This will allow you to edit the image. You will also need to do this for the barcode image.
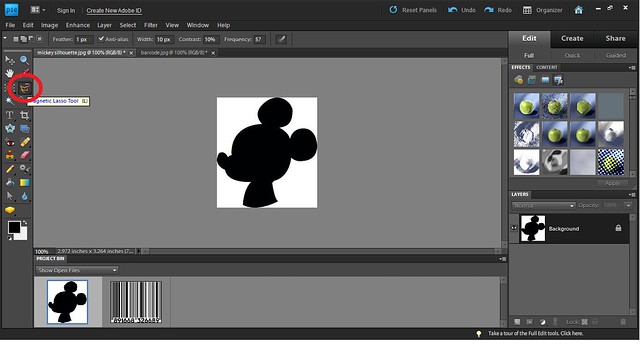
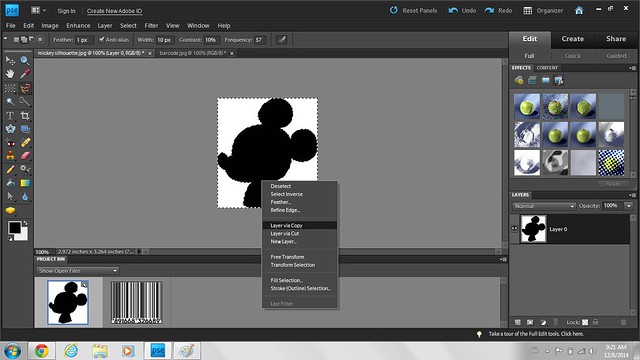
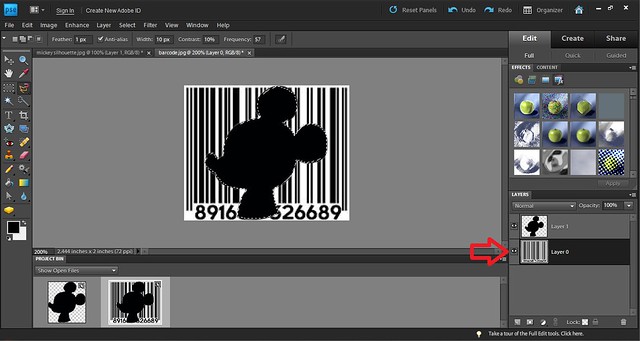
4. Using the magnetic lasso (circled in the 1st picture below) trace the outline of the silhouette (seen in image 2 below).
5. You will then need to right click on the image and choose “Layer Via Copy.”
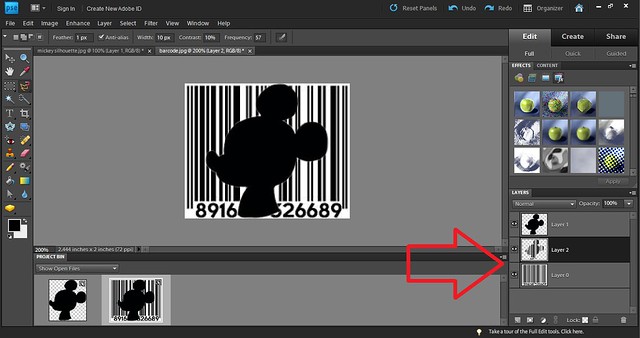
6. As you see on the image below near the arrow the image is split into two. One being just the Mickey image and the other being the image as a hole.
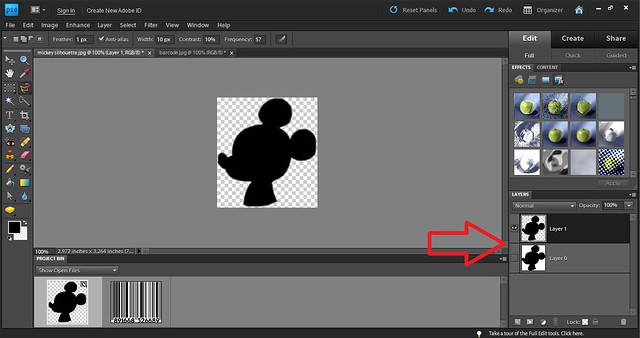
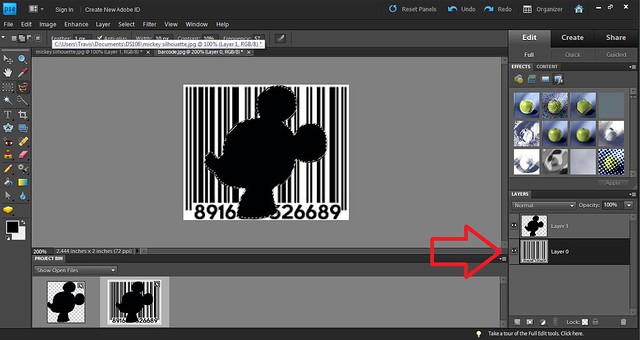
7. On the right where you see the entire image you will need to click on the eye icon to only have the mickey silhouette (no white background). This will hide all of the area you don’t want as part of your barcode.

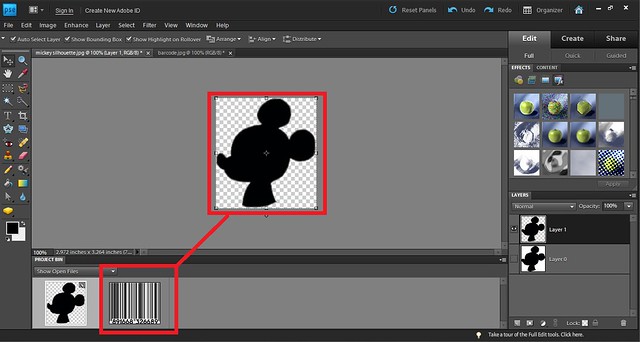
8. You will then need to choose the “Move Tool” to move this image onto the barcode one.

9. Once you selected the tool, click on the middle of the image and drag it to the bottom where the barcode image is.
10. Once you dragged it correctly the image of the barcode with the silhouette on top will come onto the screen.
11. Adjust the sizing the of the silhouette so it fits on the image of the barcode. Once you have it adjusted how you want it click the green arrow to confirm the sizing.

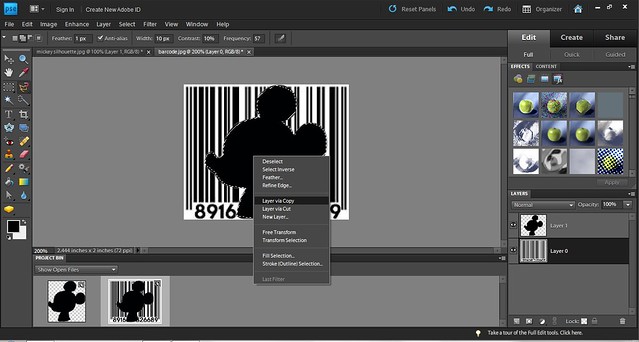
12. Next, repeat the magnetic lasso step of the Mickey Silhouette. Drag the lasso around the image but you may have to left click to get it to stick since there is another image in the background. A trick is to select the eye icon of the barcode layer on the right of the screen to hide it and then once it is lassoed select the eye icon to replace the layer.
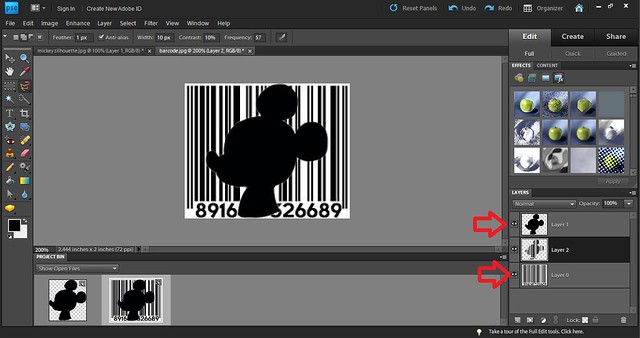
13. Once the image is lassoed make sure you are on the layer with the barcode and not the mickey. As seen in the image below. To select that layer just left click on it. This will not mess up the lasso you have already completed.
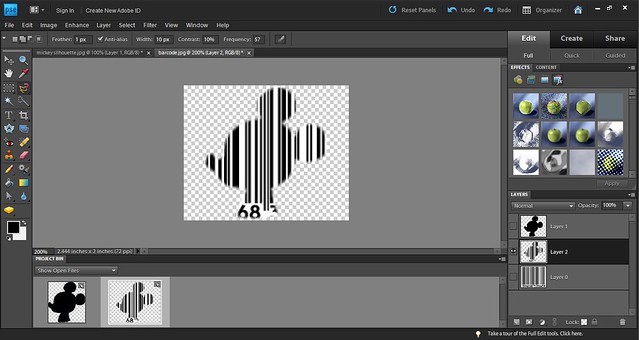
14. Next, right click on the main image and choose “Layer Via Copy.” (1st image below). This will create 2 layers for the barcode image on the right of the screen as seen in the second image below.
15. Now to get the barcode silhouette alone you will need to click the eye icons for the Mickey Silhouette Full Barcode image. This will create your final image.
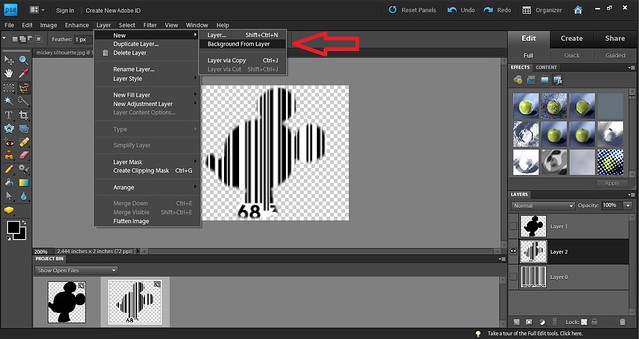
16. Lastly to add a background to the image slected the tab at the top of the screen “Layer” and then “New Layer” then “Layer from background.
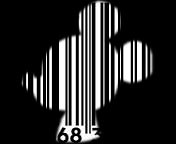
17. Final Image